
Enhance
How you get here: immediately after taking or picking a photo in the camera. Requires an account? Yes.
What this is
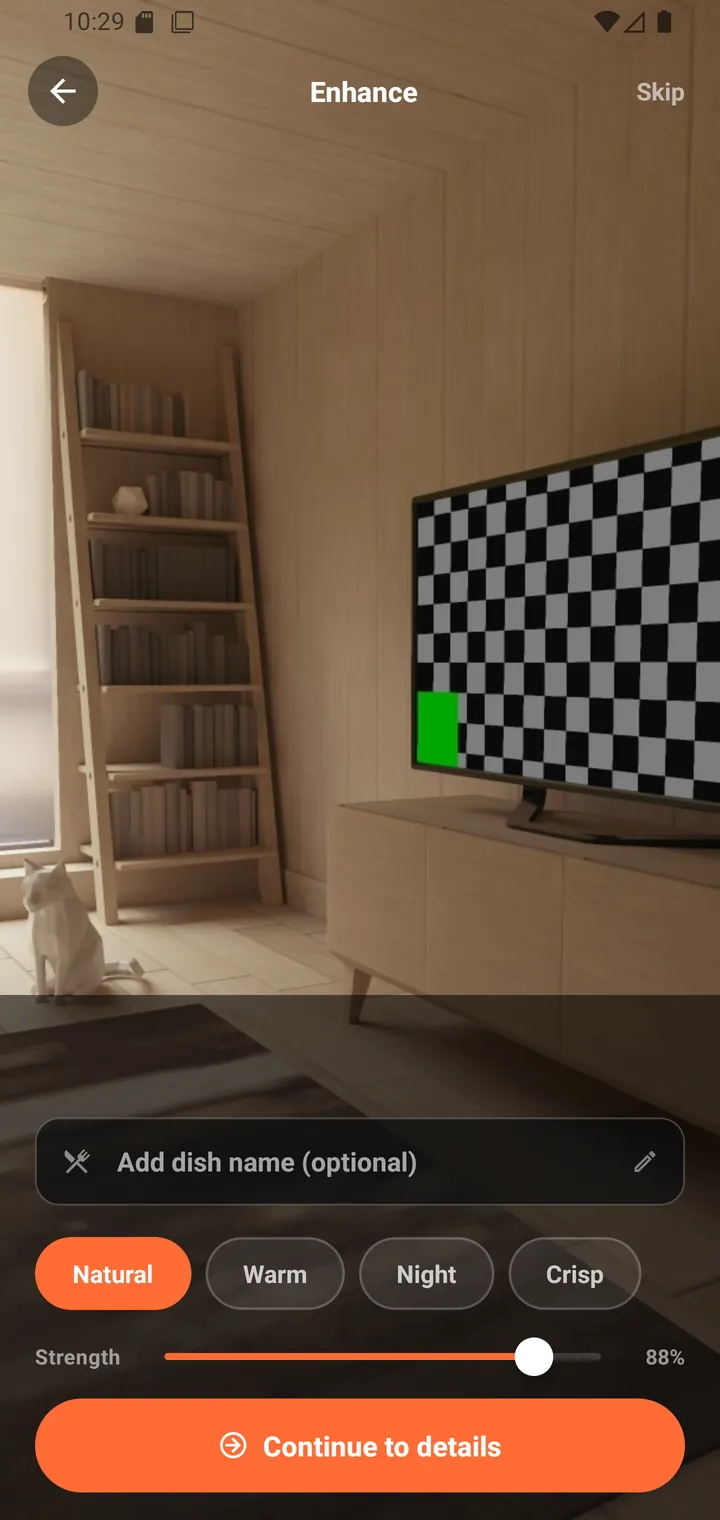
The grading step. Unlike the camera's live preview, this screen renders the exact colour matrix that will be applied — so what you see here is what you get.
The controls
| Control | What it does |
|---|---|
| Skip | Top-right. Keeps the photo ungraded and moves on. |
| Add dish name (optional) | An inline field over the photo. |
| Filter strip | Natural, Warm, Night, Crisp — the same four grades as the camera, shortened. |
| Strength | A slider, shown as a percentage (default around 88%). |
| Continue to details | The primary action. |
Each preset carries its own sensible default strength, and picking a preset resets the slider to that default. From there you can dial it back — the slider is what stops the grades feeling like heavy-handed filters.
Why the name field is here
Adding the dish name at this point, rather than later, means the next screen can be pre-filled and the AI has something to match against. It stays optional.
Where you go next
Continue to details goes to Dish Cards. Skip does the same thing without a grade.